First-Time NBI Online Application Tips You Must Know
If you’re applying for an NBI Clearance for the first time, welcome! It can feel a little confusing at first — but trust me, once you know the steps and a few insider tips, it gets way easier. This guide is written in simple language, like I’m explaining it to a friend over coffee. Let’s get started!
NBI Clearance is a key document in the Philippines. Employers, government agencies, schools, and even some travel or visa processes ask for it because it shows you don’t have a criminal record.
What You Need to Know Before You Start
Before you jump into the online application, here are a few basics:
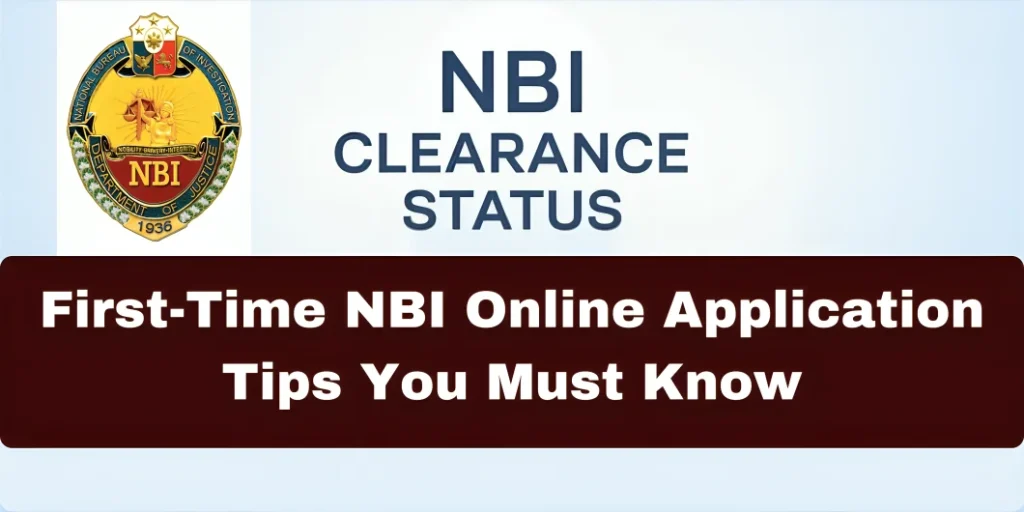
Step-by-Step: First-Time Online Application
Go to the official NBI online portal and click to register as a new user.
- Use an active email and mobile number — you’ll get a verification message here.
- Fill in your personal details carefully. This is the info NBI will verify later at the office.
- Choose “No” when asked if you have a clearance from 2014 to present, if this is really your first time.
Tip: Write down your username and password somewhere safe — you’ll need them again.
After registration, you’ll get a verification code (OTP) on your phone or email.
- Enter the code within a few minutes to complete verification.
- If you don’t get the code, check your spam email folder or resend the OTP.
Tip: Use the same email for all future NBI updates — it makes tracking easier.
Log in, and fill in your details like:
✔ Name
✔ Birthdate
✔ Address
✔ Contact details
Double-check everything — mistakes here mean more hassle later.
appointment day. This could be:
- Passport
- Driver’s License
- National ID
- UMID Card
- Birth Certificate (if approved)
Tip: Bring two valid IDs on appointment day just in case. It’s always better to have backups.
This is super important:
- Pick your preferred NBI branch.
- Choose an available date and time.
- Slots fill up fast, so try to book early in the day — mornings are best.
Tip: If your preferred date is full, check other nearby branches — they often have open slots.
Once your appointment is scheduled, you pay the fee using one of the available payment options in the system.
Save your payment receipt — either printed or on your phone.
Take note of your reference number — you’ll need this at the NBI branch.
On the day of your appointment:
✔ Bring your reference number
✔ Bring your payment receipt
✔ Bring your valid IDs
✔ Arrive early — at least 20–30 minutes before your time
When you get to the NBI office, they’ll verify your info, take your photo and fingerprints, and check your application.
you can also read about: How to Apply for NBI Clearance Without Online Issues
🎯 Top Tips for First-Timers
Here are some quick, practical tips to make life easier:
💡 Use Stable Wi-Fi or Internet
Registration and payment can fail if your connection drops.
💡 Avoid Mistakes in Your Name or ID Numbers
Typos lead to delays or rejected applications.
💡 Save Screenshots of Your Application
Screenshots of your reference number and appointment details are lifesavers if anything goes wrong.
💡 Arrive Early on Appointment Day
Even with a booking, arriving late can delay your turn.
💡 Stay Calm If You Get a “Hit”
A “hit” doesn’t mean you’re in trouble — it just means the system found a similar record and needs extra verification. This can take a few days, but it usually gets resolved.
FAQ’s
Final Words
Getting your first NBI Clearance online doesn’t have to be scary or slow. With clear steps, careful details, and smart planning, you can get it done quickly and stress-free.
Start by registering online, book your appointment early, and bring all your documents on the day you visit the NBI branch. Little things like saving your reference number and double-checking your information make a big difference!
You’re ready — go ahead and start your NBI application with confidence! 😊